Lab - Add a Custom Font Bundled with the Theme
In this lab, you will:
- Add a custom font bundled with the theme
- Add a custom font hosted outside the theme
- Add a new Google font
Prerequisites
- Previous labs have been completed
- Stencil CLI installed
- Base Cornerstone Theme downloaded and initialized
Applying Custom Fonts
There are two paths to take for using custom fonts:
- Change to a new Google Font
- Use a custom font
Google Fonts
Google Fonts is a collection of open source fonts available for use. The base Cornerstone theme uses Karla and Montserrat. Google Fonts come included in the Cornerstone theme. In config.json update each place you want the change with the name of the new Google Font.
Make sure it follows of the format Google_FontName_Weight.
If you are using a different theme, verify using Google Fonts.
Add a Custom Font Bundled with the Theme
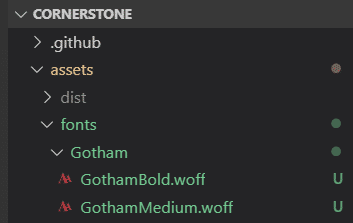
Step 1: Add Font Files to the Theme
- Create a new directory in assets/fonts
ex. /assets/fonts/Gotham - Drag and drop the font files into the new directory
Step 1.2: Create Font Face Rules for Each Version on the Font in the New Directory
- Open the main layout template file at templates/layout/base.html
- Within the
<head>block, add a style block with @font-face rules for each version of the font in the new directory
Step 1.3: Add the New Font to Available Schema
To make sure the new font is available in the fonts list when editing in Page Builder, add it in schema.json.
- Open the file schemaTranslations.json
- Add translated labels related to the new font
- Open the file schema.json
- Locate the “options” group for the “headings-font” setting
- Add the new font options to the array
Step 1.4: Use Your New Font in the Theme
- Open the config.json file in the top level of the theme directory
- Locate the “headings-font” setting
- Replace the original font family with your new font family name
ex:"headings-font": "Gotham_700" - View the new font on your storefront
Note that your new default value in config.json should match the “value” of one of the available font settings you added in schema.json.
Add a Custom Font Hosted Outside the Theme
Custom Fonts
Custom fonts can be used in any theme. To use a custom font, upload it to the stores /content/ folder in WebDav.
For more information on custom fonts, go to: Custom Fonts and Icons.
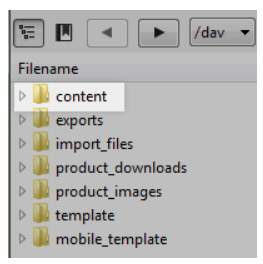
Step 2: Add Font Files to WebDAV
- Connect to WebDAV using these instructions: https://support.bigcommerce.com/s/article/File-Access-WebDAV
- Drag and drop the font files into the content directory

You cannot create new top-level directories in WebDAV, but you can create new subdirectories. If you receive a permissions error trying to create a subdirectory, try dragging a folder created on your desktop into the target directory in WebDAV
Step 2.1: Create Font-Face CSS Rules to Load Your Font
- Create a new scss file in the assets/scss/fonts directory
Ex: assets/scss/fonts/_indigo.scss - Create @font-face rules for each version of the font in the new directory
Referencing from the CDN
Any time a file is uploaded to the /content/ directory, it is best to reference it from the CDN. The steps in this lab reference the font from the store’s domain, but you can use the URL structure below to access the /content/ directory on the CDN:
https://cdn11.bigcommerce.com/s-<STORE_HASH>/content/
Step 2.2: Import Your New SCSS File
- Navigate to assets/scss/fonts directory
- Open the assets/scss/fonts/_fonts.scss file
- Add the following to the top of the file:
Step 2.3: Use Your New Font in the Theme
- Navigate to the config.json file in the top level of the theme directory
- Locate a key-value pair that sets a font family
ex:"body-font": "Google_Karla_400" - Replace the original font family with your new font family name
ex:"body-font": "Indigo Regular" - View the new font on your storefront
Step 3: Add a New Google Font Reference to config.json
- Navigate to the config.json file in the top level of the theme directory
- Locate a key-value pair that sets a font family
ex:"headings-font": "Google_Montserrat_400" - Update the value with the format
"Google_Font+Name_FontWeight"
ex:"headings-font": "Google_Lobster+Two_700"
When you create @font-face rules be sure to choose a font weight that is available on Google. If you choose a weight that is not available on Google, it won’t exist and it will default to the browser default font.
- View the new font on your storefront
Google font support is included in the base Cornerstone theme. Other marketplace themes may not come with this built-in.