Lab - Theme Editor Text Fields
In this lab, you will:
- Create a new component for customer group messaging
- Add the new component to the store’s header
- Create a new custom.scss file
- Import the new custom.scss file into the theme.scss file
- Create key value pairs in config.json for the customization defaults on the new component
- Create data types in schema.json to allow the new component to be customized through Theme Editor
Prerequisites
- Previous labs have been completed
Before proceeding, either switch back to the original variation (stencil start), or ensure you are making changes in the Settings of the variation created above.
Step 1: Create a Customer Group and Assign a Customer
- Log in to your store’s control panel
- Navigate to Customers > Customer Groups
- Enter a name for your Customer Group and Save and Exit
- Navigate to Customers > Add
- Enter the required details to create a customer
- Assign the new customer to the newly created Customer Group
- Save and Exit
Step 2: Create a New Component for Customer Group-Specific Messaging
- Navigate to the templates/components/common directory
- Add a new HTML file named customer-group-special.html to the directory
- Inside the new file, add the following code:
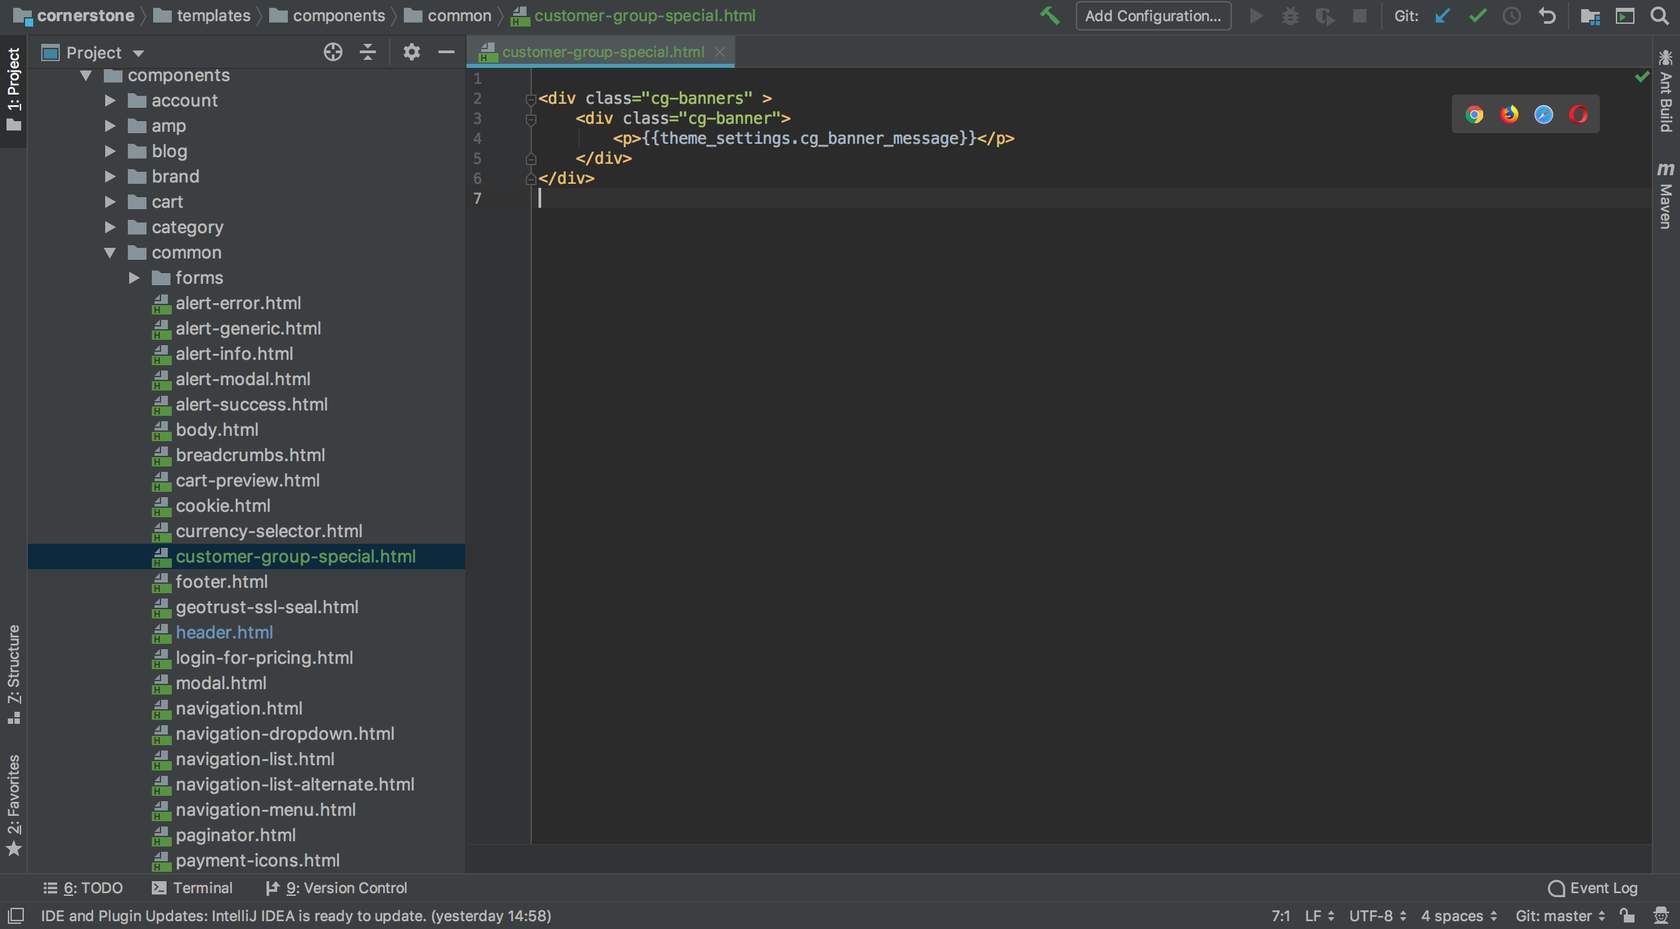
This creates a new component with a text field that will be editable in the Theme Editor.
Step 3: Add the New Component to the Header
- Navigate to the templates/components/common/header.html file
- Add the following to the header.html file just before the
</header>tag:
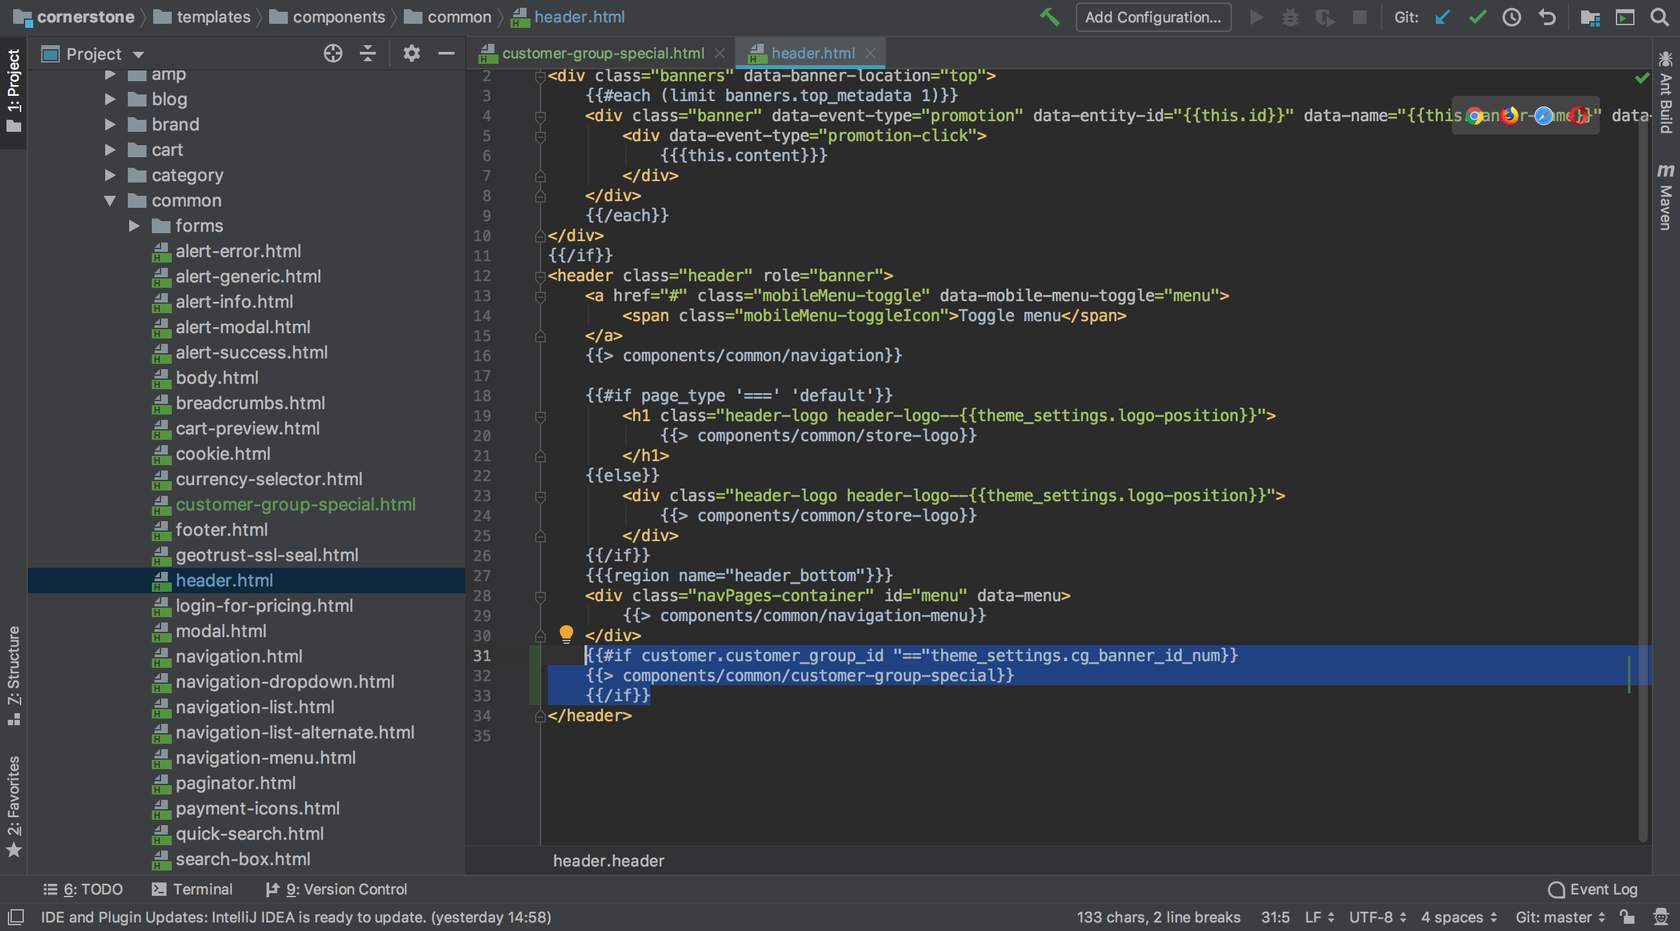
This makes the new component render in the header, if a customer in a specific group is logged in. The target group will be specified within the theme editor.
Step 4: Create a New custom.scss File
- Navigate to the assets/scss directory
- Create a new file in the assets/scss directory named custom.scss
- Paste the following scss into the new file:
Step 5: Import the new custom.scss File in the theme.scss File
- Navigate to the templates/assets/scss/theme.scss file
- Add the following at the bottom of the file:
Step 6: Create Key Value Pairs in config.json for the Customization Defaults on the New Component
- Navigate to the config.json file in the main theme directory
- Add the following to the top of the “settings” section of the config.json file:
“cg_banner_id_num”: “1”, needs to match the customer group id for the group being tested against. In order to do this, you must have a customer group, have a customer in that group, and be logged in as that customer on the localhost.
Step 7: Add to schema.json to Allow the New Component to be Customized Through Theme Editor
- Navigate to the schema.json file in the main theme directory
- Add the following to the top of the Header section’s settings in the schema.json file:
You will be able to preview your changes through Page Builder once the theme has been deployed.