Customizing JavaScript
Cornerstone Theme Pages
Most Cornerstone theme page template files located in templates/pages/ have a corresponding .js file in assets/js/theme/. These JavaScript files contain event handlers and logic for managing page-specific elements and actions.
For example, assets/js/theme/product.js corresponds to templates/pages/product.html and contains a productReviewHandler() and bulkPricingHandler(). These functions are implemented within a derived Product class which extends the PageManager class. This same pattern is repeated in all assets/js/theme/*.js files.
By default, all derived PageManager classes contain an onReady method functionally similar to JQuery.ready(). Additionally, certain pages have unique event handlers. For example, the setApplePaySupport function in assets/js/cart.js is executed and variables like this.$cartContent are populated when the DOM is ready.
Developers can customize and enhance page behavior and functionality by editing code within these event handlers or by creating their own event handlers.
Modifying a page’s JavaScript
In this example, we will add some “Hello World!” text to the product page’s onReady event. We’ll first add a call to the function. Then, we will implement the function itself.
First, implement the helloWorld() function by adding it to the Product class just after the closing onReady() bracket.
Next, in assets/js/theme/product.js file, add a call to this.helloWorld() to the bottom of the onReady() method, which we’ll implement in the step below.
In your browser, refresh any product details pop-up or page to see your new “Hello World” message.
Handlebars Context
Bringing in Handlebars context
You can inject any variables from the Handlebars context into your client-side JavaScript by using the {{inject…}} expression.
To inject theme settings.productthumb_size_into the product page’s context, add {{inject 'productThumbSize' theme_settings.productthumb_size}} just under {{#partial "page"}} in templates/pages/product.html:
The injected productThumbSize property can then be accessed from product.js by calling this.context.productThumbSize.
Note: That the console.log(this.context.themeImageSizes); statement will report the configured image size, following the “Hello World!” message previously defined in the Customizing JavaScript for Individual Pages above.
Installing Libraries
Once you have installed the default Stencil theme, you can add custom JavaScript libraries with npm. The code examples below show how to install the moment.js library:
Next you can import modules from the library into the theme’s JavaScript files. For instance, you can add the following import statement to assets/js/theme/product.js to load moment on the product page:
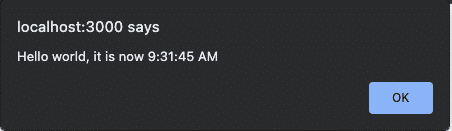
After importing the module, you can access it later in the file. Add the following to the onReady method in assets/js/theme/product.js to display an alert with the current time when the page is ready.
The resulting alert will look like: