Integrate Buyer Portal with Stencil
Stencil Setup and Deployment
Default State — Hosted Buyer Portal
Any Stencil storefront with B2B Edition enabled will include the hosted version of the B2B Buyer Portal by default.
When B2B Edition is activated for the storefront, B2BEdition Header Script and B2BEdition Footer Script will automatically be configured in the channel’s Script Manager.
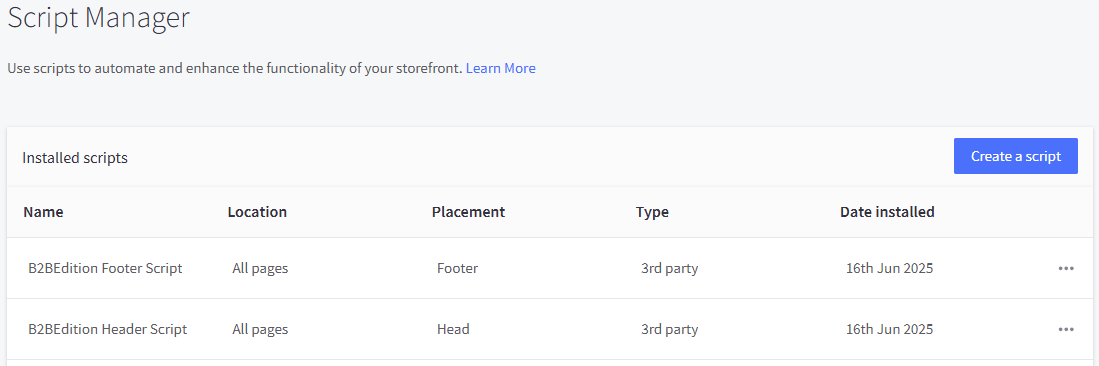
The Role of Script Manager
Scripts configured within Script Manager for a storefront channel are automatically injected into the Stencil theme for that storefront. In the case of the B2B Buyer Portal, these scripts are injected into all pages of the storefront to initialize the React application.
This means that, in Stencil, this entry point is the traffic controller that determines whether the storefront loads the hosted Buyer Portal experience or your own customized Buyer Portal.
With the default scripts in place loading the hosted Buyer Portal, your storefront will automatically receive updates when new versions of the Buyer Portal are released. However, if you have customized the Buyer Portal as described below, it is up to you to pull in upstream changes from the Buyer Portal repository and integrate them with your own customizations.
Forking and Running the Buyer Portal
Prerequisites
See B2B Buyer Portal Setup Overview for general prerequisites. You will need a V3 BigCommerce API token with the B2B Edition scope.
Clone and Run the Buyer Portal
- Clone the B2B Buyer Portal repository.
- Install dependencies:
- Copy
apps/storefront/.env-exampleasapps/storefront/.env. Note that, for initial development in the local environment, no values need to be changed in this file. - Start the development server:
While the development server is running, the necessary Buyer Portal loader files will be served via a local URL (usually localhost:3001). You should not browse directly to this URL; the next step will take care of updating your Stencil storefront to point to this local server.
Update the Storefront
After your local Buyer Portal instance is running, you must now update your Stencil storefront to inject this version of the Buyer Portal instead of the default hosted version.
- Navigate to Script Manager in the BigCommerce control panel. (In a multi-storefront configuration, you’ll find this in the settings for the individual storefront channel.)
- Delete the default “B2BEdition Header Script” and “B2BEdition Footer Script.”
- Add two new entries for header and footer scripts as described in the Stencil Guide in the Buyer Portal repository.
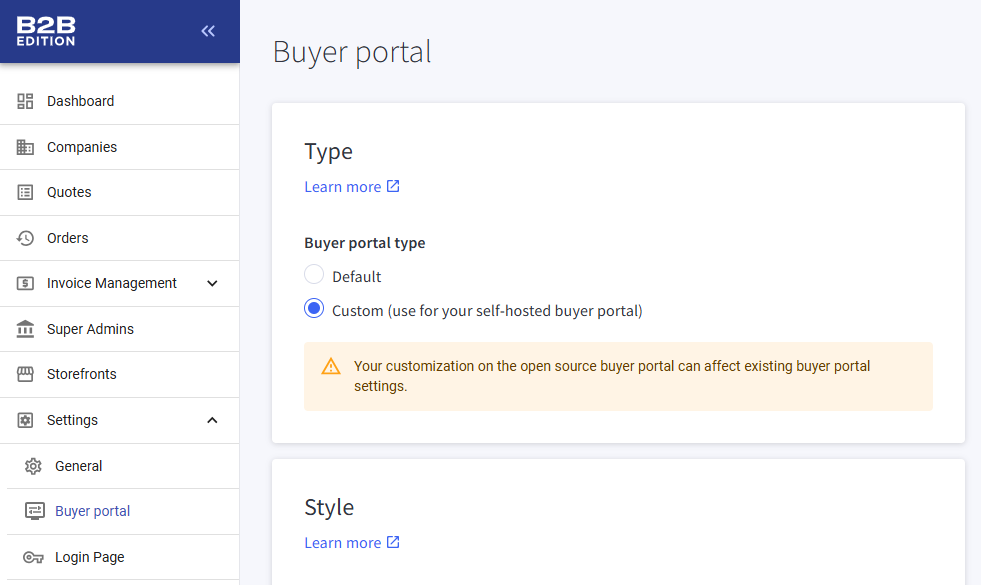
- Navigate to B2B Edition in the control panel and set “Buyer Portal type” to “Custom.”
-
In a single storefront configuration, this is found in the main Buyer Portal settings.
-
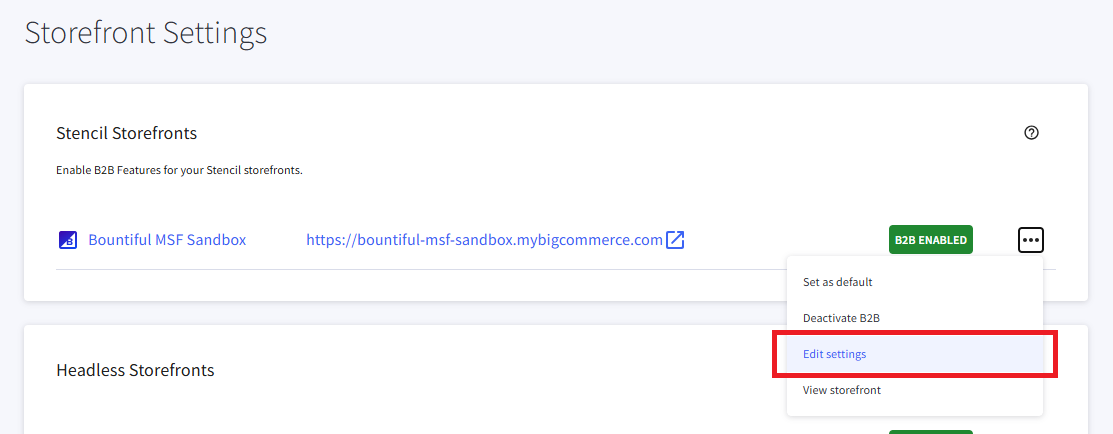
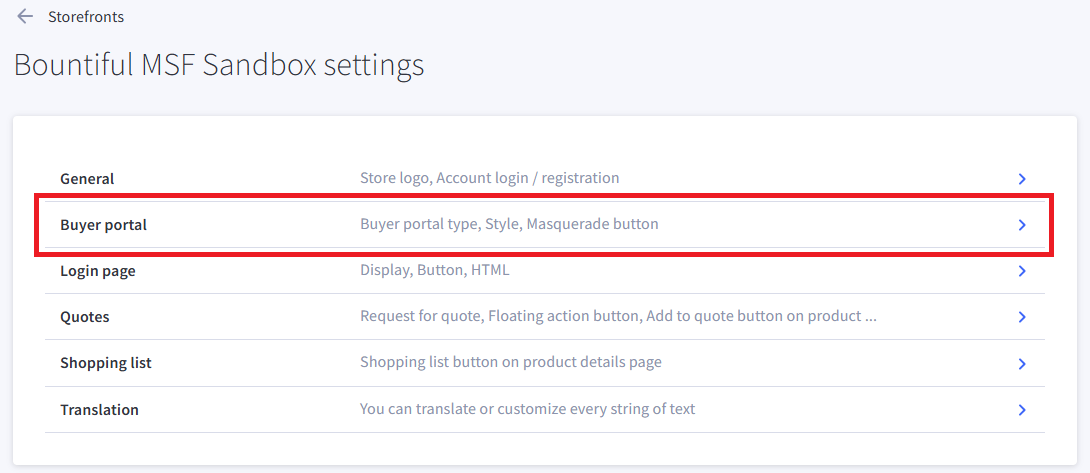
In a multi-storefront configuration, update this setting for the specific storefront.
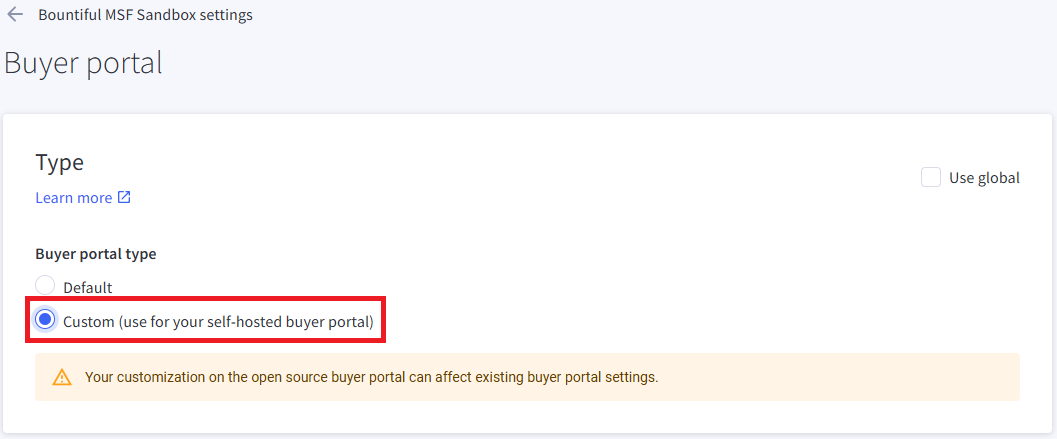
-
Using this “Custom” setting in B2B Edition will ensure that automatic updates will not interfere with the scripts you have configured to inject your custom Buyer Portal.
With your local Buyer Portal instance running and the storefront scripts updated, your custom Buyer Portal will be loaded into the Stencil storefront, and you can actively develop on the Buyer Portal code.
Note that Script Manager will control the Buyer Portal injected into the storefront whether in a Stencil CLI live preview or in the actual hosted storefront. The above steps should only be taken in a sandbox store or on a storefront channel in prelaunch status.
Building and Deploying
Once you are ready to take your custom Buyer Portal to your production storefront, the Buyer Portal files must be built and deployed.
For the following steps, you must know in advance the URL where your build files will be deployed. (For example, https://my.custom.cdn/generated/b2b/.)
- Set values in
.envappropriately for building.
- Run the build.
yarn build
-
Copy the contents of
apps/storefront/distto your chosen CDN or hosting provider.As an example for how the URLs of the final build files should be represented, consider that
distshould contain these two files/directories (among others):assetsindex.js (or index-{hash}.js)
Assuming the example URL value above was used for
VITE_ASSETS_ABSOLUTE_PATH, after deployment we should have URLs like:https://my.custom/cdn/generated/b2b/assetshttps://my.custom/cdn/generated/b2b/index.js
-
Navigate to Script Manager in the BigCommerce control panel and update the B2B Edition header and footer scripts as described in the Stencil Guide in the Buyer Portal repository, making sure once again to use the appropriate base URL.
When re-building and re-deploying your custom Buyer Portal, you should clear the local contents of .turbo/cache before running yarn build to ensure that all updated code is reflected in the build. Also make sure to update your scripts in Script Manager again after deploying your new build files.
Deploying with WebDAV
Your BigCommerce store’s WebDAV storage can be a viable option for serving your custom B2B Buyer Portal files without sourcing a third-party CDN.
Follow the instructions in the above support article to learn about enabling WebDAV and connecting with a client like Cyberduck. Once you’re connected, you can use your store’s WebDAV as the upload destination for the steps described in Building and Deploying.
The directory content should be used for static files of this nature. Let’s say you intend to upload the build files from dist into content/b2b on your store’s WebDAV. This will make your Buyer Portal files available at the following URL:
https://{my-store}.com/content/b2b/
The files can also be accessed via the store’s canonical URL, in this format:
https://store-{store-hash}.mybigcommerce.com/content/b2b/
Either of these should be used as the value of VITE_ASSETS_ABSOLUTE_PATH before running yarn build, and the same value should be utilized when updating the scripts in Script Manager.
Versioning Strategy
As mentioned above, by default the build process includes a hash in the filename of several key files. If you’re hosting your build files on your store’s WebDAV, for example, the following would be an example of the final URL of such a file:
https://{my-store}.com/content/b2b/index-{hash}.js
This is a file-based strategy for avoiding stale cached files being served to shoppers. Upon a new build/deploy, you must make sure to update each file URL referenced in Script Manager each time you deploy new Buyer Portal build files.
Another strategy is to include a unique identifier in the subdirectory of your deployed location rather than in each individual filename. For example, say you configure VITE_DISABLE_BUILD_HASH to TRUE before building (resulting in filenames without a hash) and then upload the build files to a subdirectory of your store’s WebDAV that includes a date-based string. This could result in URLs like the following:
https://{my-store}.com/content/b2b-20260101/index.js
As with the file-based strategy, your scripts in Script Manager must be updated to reflect this new path. However, this approach can make it easier to upload your new build files without overwriting previous build files, ensuring that the previous Buyer Portal version continues to be served to end users until Script Manger is updated.