Lab - Bundle and Upload a Theme
The Stencil CLI tool is used not only for running a preview of your theme on a local server, but also for bundling your theme package and even automatically uploading it to your store.
In this lab, you’ll practice both bundling and automatically uploading and applying your theme.
In this lab, you will:
- Bundle a theme into an upload-able package
- Upload and apply a theme
Prerequisites
- The Stencil CLI tool installed as in previous labs
- A theme project in a local location, as set up in previous labs
- A Stencil CLI token with the “publish theme” access level, as configured in previous labs
Step 1: Bundle Your Theme
The Stencil CLI bundle command will bundle the contents of your theme package into a zip file compatible with uploading in the BigCommerce control panel.
In order for a theme to be bundled, it must meet the following requirements:
- The total bundle size must not exceed 50 MB. Static assets like images included directly within a theme package are usually the cause of themes that exceed the limit. See the BigCommerce documentation for tips on reducing the size of a theme.
- All directories must have file permissions set to 755 (drwxr-xr-x), while all files must be set to 644 (rw-r—r—). Make sure to set these permissions accordingly when creating new files and directories.
Follow these steps to name and bundle your working theme:
- Open the file config.json and set a unique name for your theme, as well as an appropriate version number if desired.
config.json contains a number of other settings describing the theme, particularly under the meta key. These settings, including author information, thumbnail image, support URL, and supported features, should be completed for any theme intended for the marketplace.
- Verify that the theme also has at least one entry in variations in config.json, with a name and id. The settings for your variation can be empty, in which case the default settings will apply. The original Cornerstone configuration will have Light, Bold, and Warm variations.
- Run the following command from your theme’s working directory:
- Verify that the bundle operation was completed without errors, and that the bundle zip file has been saved to your working directory.
The zip file will be named according to the theme name and version number stored in config.json, in the form <theme_name>-<version>.zip.
Your theme bundle file is now ready to be uploaded manually in the control panel, an action which can be found in the Themes tab, found in the Storefront section or in the settings of an individual channel in Channel Manager.
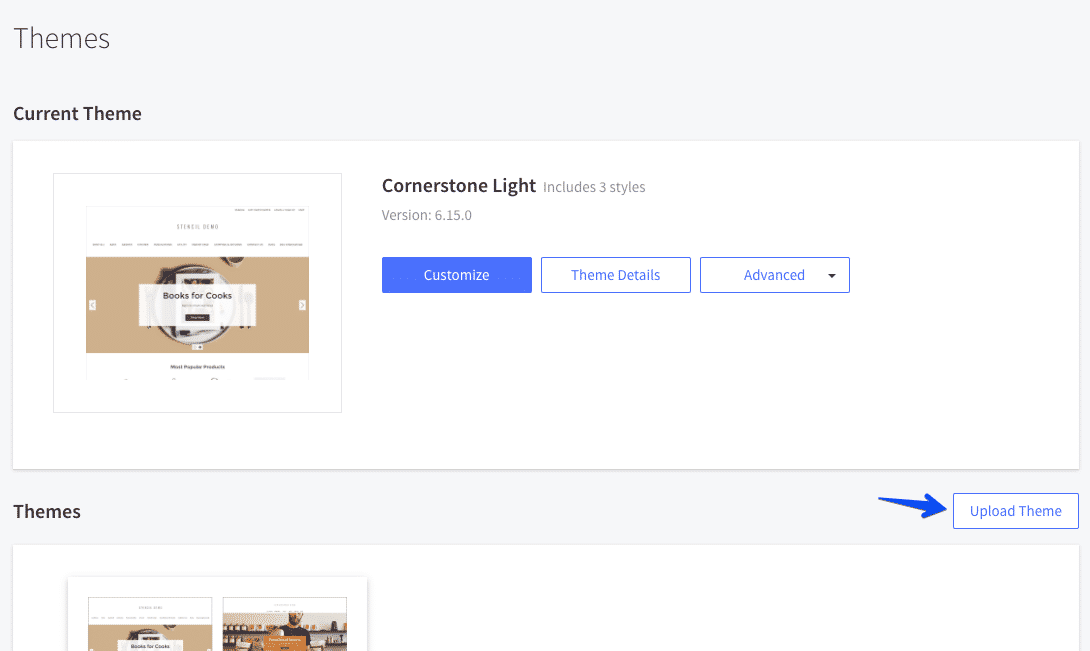
Multiple themes can be uploaded in the control panel. The theme currently applied to the storefront can be updated by taking the “Apply” action under any of the available themes.
Step 2: Upload and Apply Your Theme
While a theme bundle can be manually uploaded in the control panel as described above, the Stencil CLI tool can also be used to do this, as well as to automatically apply it as the storefront’s active theme.
Note that the Stencil CLI push command takes care of both bundling and uploading the theme in a single step. It is not necessary to run stencil bundle before running stencil push.
Remember that the Stencil CLI token you generated in the store control panel must be configured with the “publish theme” access level in order to successfully upload a theme.
- Run the following command from your theme’s working directory:
After the initial bundling process, you will potentially get several interactive prompts from this command.
- Enter “y” when prompted on whether to apply the theme to your store.
- If your store has multiple storefronts, select a channel when prompted.
- Select a variation to apply when prompted.
- Verify that the push operation was completed without errors.
Automatically applying the theme may not work with the CLI, depending on your store configuration. The theme package will still be uploaded and can be applied manually in the control panel.
It’s also possible to use CLI options to avoid these interactive prompts. For example, specify a variation to automatically apply with —activate:
- In your store control panel, in the storefront settings for your channel, verify that your newly uploaded theme is the currently active theme.
- Browse to your main storefront URL and verify that your subcategory listing feature functions.