Lab - Deploy Catalyst to Vercel
Your final step for your custom Catalyst storefront will be to deploy it to a publicly available Vercel project.
In this lab, you will:
- Deploy your new Catalyst project to a public domain on Vercel hosting
Prerequisites
- A command-line interface on your local machine
- The Git CLI
- An existing account on GitHub (or your preferred Git provider), with a personal access token or SSH key configured to allow pushing to repositories from the CLI
- An existing account on Vercel, connected to your GitHub account
If you are setting up a GitHub account for the first time, see the documentation for signing in with a passkey or for generating an SSH key.
Step 1: Push to a Remote Repository
Note that in a project you have initially set up with the Catalyst CLI installer, you will already have a local Git repository, ready to set up a remote and push your history.
In this exercise, your local codebase was set up without a Git repository, so your first step will be to initialize one.
Before deploying to Vercel, your code will first need to be under source control in a remote repository with your preferred Git provider.
- In the root directory of your customized Catalyst project, commit the current state of the codebase.
The initial project setup should have left a local Git repository in place, but if necessary, initialize one before committing the current state:
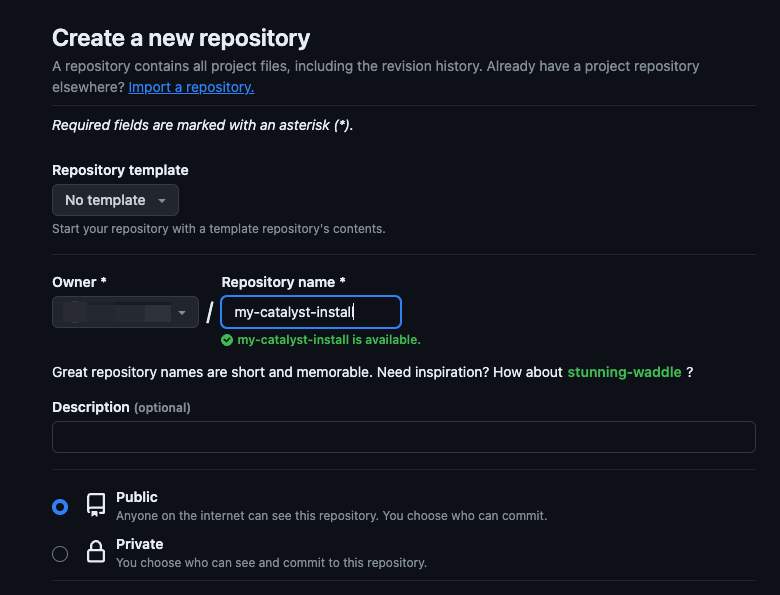
- Visit https://github.com and log into your GitHub account.
- Create a new repository and give it an appropriate name.
- On the front page of your new repository, find the instructions labeled “push an existing repository from the command line.” Run these commands in the root of your Catalyst project.
- Refresh the front page of your GitHub repository to verify that your codebase has been successfully pushed to the remote repo.
Step 2: Deploy to Vercel
Initial Deployment
- Visit https://vercel.com.
If you have not connected a Git account, you’ll have the chance to do so when you create a new project in the following steps.
- In your Vercel dashboard, click Add New > Project in the top right navigation.
- Under Import Git Repository, import your newly created GitHub repo with your Catalyst project.
- After you have entered a name for the project or kept the default name, expand the Environment Variables section of the project configuration.
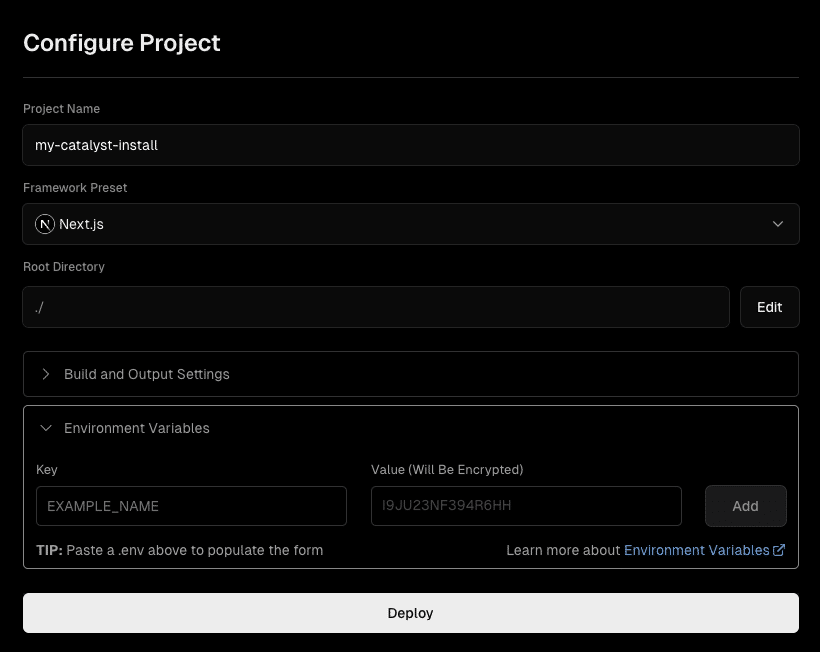
- Enter each of the variables found in your local file
.env.localwith the same values. You can do this by selecting the entire contents of.env.localand pasting in the first varkeyfield.
Keep in mind that, since you’ve copied your local project’s configuration settings, MAKESWIFT_SITE_API_KEY contains the API key for the developer site in your Makeswift workspace. Once you have updated the domain name of your storefront channel and Makeswift site to point to your own hosted Catalyst application, make sure to update this value with the appropriate API key.
- Click Deploy.
The build and deployment process will likely take several minutes. When it’s complete, follow the navigation link to visit your new storefront. You now have a working Catalyst storefront URL that can be shared publicly!
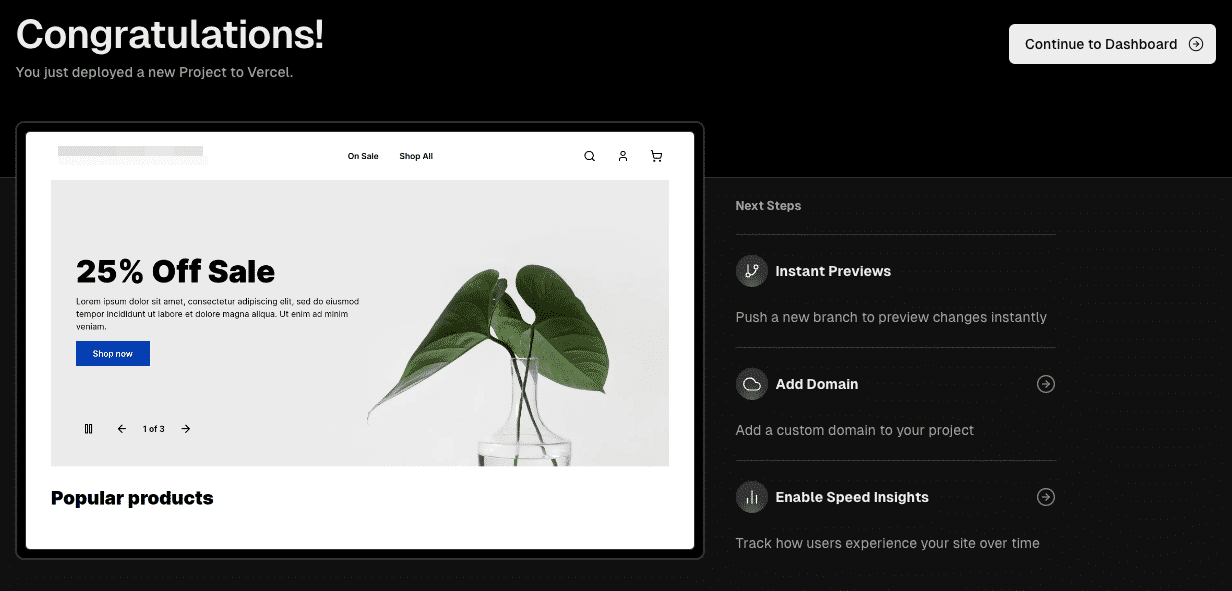
As you customize your Catalyst project, re-deploying to Vercel is as simple as pushing your latest Git commits to your GitHub remote repo.
Clearing the Data Cache
Just as you cleared the Next.js Data Cache manually in your local environment, you may need to do so sometimes for your deployed Vercel project.
Navigate to Settings > Data Cache in your project to find the Purge Cache option.
Setting Your Domain
With the completion of this hands-on lab, you have a publicly available custom Catalyst storefront with its own auto-generated Vercel domain. However, BigCommerce and Makeswift do not yet “know” about this custom domain. Any storefront links generated by BigCommerce will still be for the URL of your original preview environment.
In a real-world scenario, once you are able to configure a domain name to point to your hosted storefront, your final step would be to reconfigure your base URL settings in BigCommerce and Makeswift.
- Configure the primary domain of your storefront channel to match your deployed custom front-end. This can be done in the Domains settings for your channel in the store control panel, or with the Channel Sites capabilities of the REST Management API.
- Update the checkout domain of your channel as well. Checkout strategy may vary, but to maintain the default redirected checkout experience used by Catalyst by default, configure a CNAME record for an appropriate subdomain pointing to your storefront channel’s canonical URL. (For example
checkout.mystore.com, pointing tostore-{{store_hash}}-{{channel_id}}.mybigcommerce.com.) Set this subdomain as the checkout URL for your channel. - Log into the Makeswift editor with the “Edit in Makeswift” action in Channel Manager, then use the Host settings for your primary Makeswift site to update the site’s URL.
- Update the
MAKESWIFT_SITE_API_KEYenvironment variable in your hosting environment with the API key of your primary Makeswift site.