Buyer Portal
Introduction
The B2B Edition Buyer Portal is a shopper-facing React application that can work on both Stencil and headless storefronts. This portal is powered by the B2B GraphQL API and uses various core BigCommerce APIs.
By replacing the default BigCommerce storefront account area, the Buyer Portal improves the account experience for both B2C and B2B customers. B2B Edition manages the account experience, providing better purchasing options for all registered users on BigCommerce. It offers personalized buying experiences and simplifies the purchasing process.
For Stencil storefronts with B2B Edition provisioned, the Buyer Portal is integrated automatically. In the BigCommerce control panel, Script Manager lists the header and footer scripts that load the hosted Buyer Portal bundle. Those scripts are kept in step with the current Buyer Portal release.
The Buyer Portal is also well suited to integrating with a fully composable or “headless” storefront, and an integration is available for Catalyst, BigCommerce’s open source Next.js storefront. See the B2B Buyer Portal course for details.
Buyer Portal Features
The Buyer Portal has features that let you customize the buyer experience to meet your customers’ needs. These features include:
- Customizable B2B account portal
- Customizable account applications for B2B and B2C customers
- Customizable login page
- Manageable and customizable floating action buttons
For open-source customization, the JavaScript API, and hands-on labs, see the dedicated B2B Buyer Portal developer course. Here, we’ll focus on the available control panel settings in B2B Edition for adjusting branding, styles, injected buttons, and the login experience, without changing application code.
Control panel: Branding and Styles
Store owners configure the Buyer Portal from the B2B Edition area of the BigCommerce control panel.
The main logo shown on Buyer Portal pages can be set in Settings > General.
Settings > Buyer portal includes:
- The Style section, where you set the primary color (action links and buttons) and the background color for the portal overall.
- The CSS Override section, where you add free-form custom CSS for Buyer Portal elements.
Buyer Portal page content is loaded inside an iframe in your storefront. You will see framing markup similar to this in the front-end source:
Your CSS selectors apply inside the iframe. Selectors that target bundle-container or bundle-app will not apply, because those elements sit outside the iframe. For CSS Override, targeting Material UI classes used in the portal structure is usually most effective.
Example CSS override
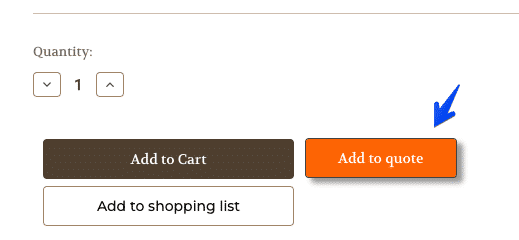
Control Panel: Action Buttons
Several settings areas control floating and injected action buttons (for example, Add to Quote on product detail pages). Typical options include:
- Button text and a basic background color
- Free-form custom CSS for the button
- A class name to apply
- A location selector that controls where the button is injected in the storefront
Custom CSS gives fine-grained control over appearance. Class name and location selector help the button match your Stencil theme. Defaults are tuned for Cornerstone; if your theme differs, update the class name to your common button classes and the location selector to the container where the button should be appended.
Buttons that float on the page (such as the Super Admin Masquerade button) usually omit a location selector and instead offer placement (for example, bottom left), vertical offset, and horizontal offset.
Settings tabs that include button configuration include:
- Buyer portal (Masquerade)
- Quotes (for example, Add to quote, Cart to quote)
- Shopping list (Add to shopping list)
Example “Add to Quote” custom CSS
Control Panel: Login Page
In Settings > Login Page, you can configure the Buyer Portal login and registration experience, including:
- Whether to display the store logo
- The text of the login and register buttons
- The HTML of the static content in the register panel
- Custom HTML above and/or below the login and register panels
Custom Account Registration
Store owners can customize account registration forms for both B2B and B2C customers. This ensures that the registration process meets the specific needs of different customer types. Offering various account options helps improve user satisfaction and makes the registration process more efficient.
- Business and Personal Registration - Customers can choose to register for a business or personal account. This is useful for businesses that serve both B2C and B2B customers. B2C customers can later apply for a business account by completing a Business Account Application.
- Business Account Registration Only - This option is for stores that only serve B2B customers. Approved business registrations create a Company Account in the B2B Edition app. The provided email and user information will be assigned to the Admin user.
- Personal Account Registration Only - Customers can register for a personal account, ideal for B2C customers. This account can be converted to a business account by completing a Business Account Application.
Personal and business account registration forms collect different information. Both forms gather details about the individual and their company. The main difference is that a business registration form creates a Company Account and a new customer account, while a personal registration form only creates a new customer account. Users with personal accounts can upgrade to business accounts by submitting a Business Account Application on the storefront.
Customizing the account registration fields for both types of accounts ensures you collect all the necessary information for a better shopper experience.
Follow the instructions below to access the Account Form Fields page in B2B Edition:
- Click Settings
- Click Account Form Fields
You can edit and add additional registration form fields from the Account Form Fields page. If you want to collect customer information that is not represented by the default fields, you can create more fields by defining the B2B Edition company and user extra fields.