Lab - Add Dynamic Data
Introduction
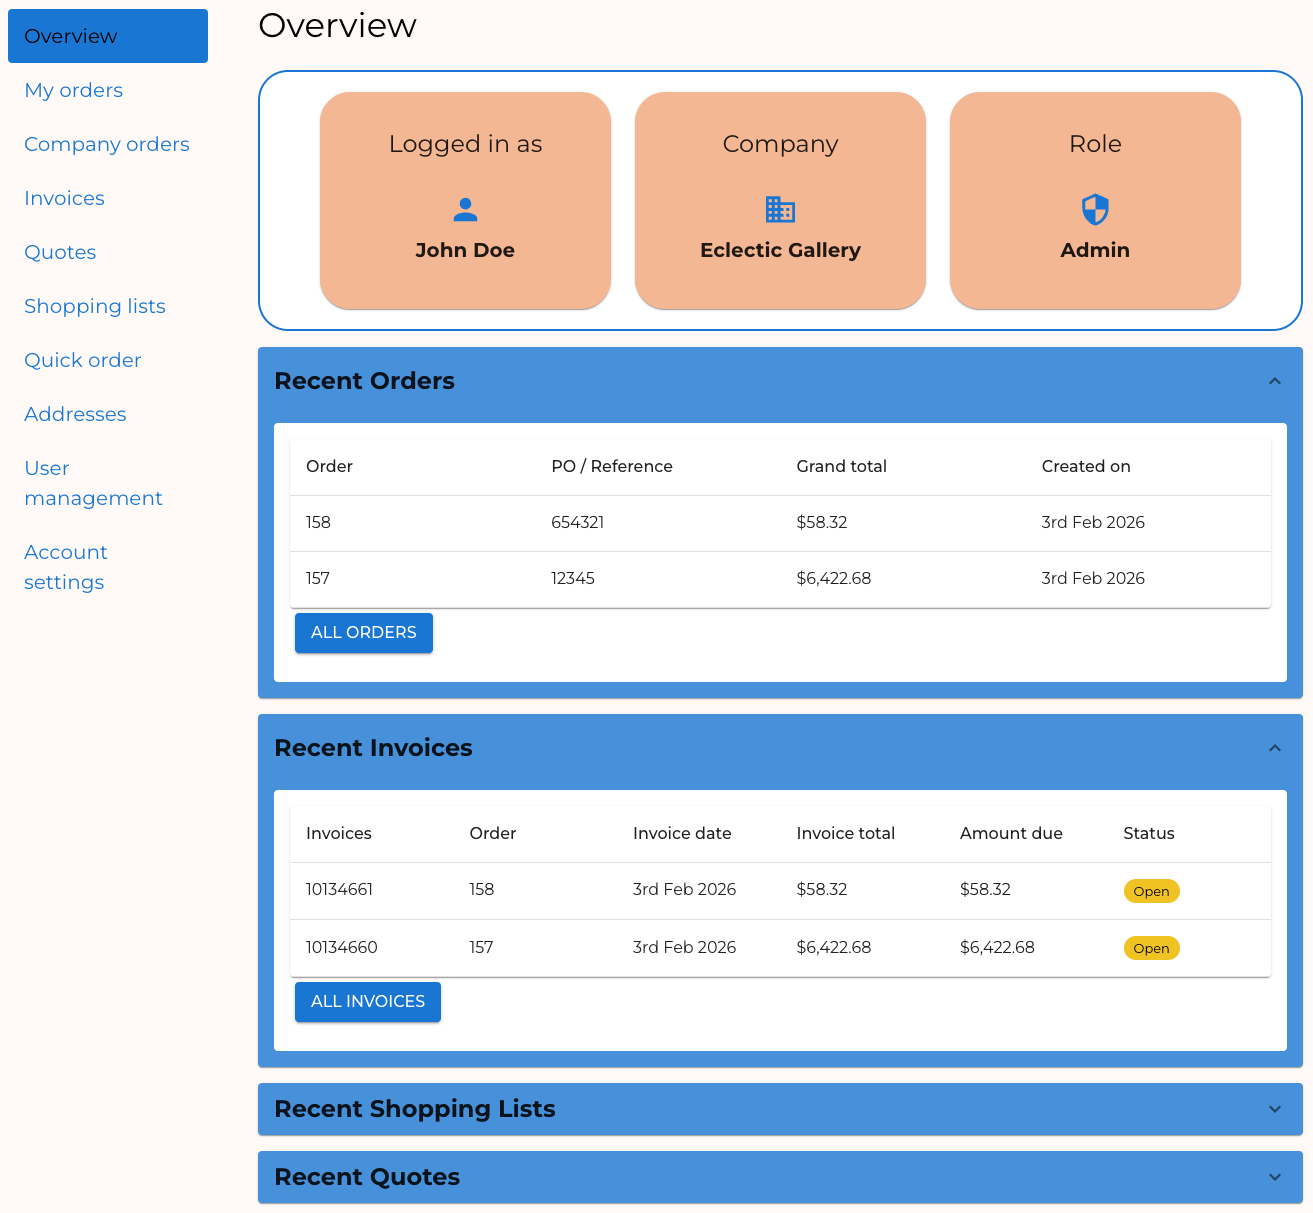
The “Recent Orders” section on our custom Overview page is currently populated with mock data. In this exercise, we’ll replace this with real data fetched via the B2B GraphQL API.
In this lab, you will:
- Write a GraphQL query to fetch recent orders
- Replace mock data with real data
- Add several more data-driven sections to the Overview page
Setup
This exercise continues where you left off previously. Make sure the dev server is started in your Buyer Portal project:
If you need a fresh start, you can follow the instructions below to set up a new project complete with previous exercise code.
- Copy the project with the appropriate tag.
- Install dependencies.
- Run the dev server.
Remember!
Script Manager in your store control panel must contain appropriate header/footer scripts to load the Buyer Portal from your local environment on the appropriate port.
Revisit the initial setup lab for full details on setting up your environment.
Exercise Reference Copy
If it’s helpful to compare your own code as you go, you can clone or download the completed version of this labs as a reference.
Step 1: Query for Recent Orders
Remember, all file paths referenced in these exercises are relative to apps/storefront/src in your Buyer Portal project.
The data.ts file in our page component’s directory already contains GraphQL logic for several sections we’ll be adding in this exercise. This file doesn’t yet contain the proper GraphQL for recent orders.
- Open
pages/Overview/data.tsand add a response interface and GraphQL query string.
It’s not strictly important where in the file this code is added. RecentOrdersResponse defines what we expect the response to our GraphQL query to look like. Note that each node is expected to be an OverviewOrder, which is another interface already defined with fields such as orderId, createdAt, and poNumber.
The fields of OverviewOrder should be familiar, as our “Recent Orders” table is already configured with columns matching these keys. The mock data currently populating the table matches this schema.
RecentOrdersQuery is the GraphQL query itself, using the allOrders field to fetch a list of records. Note the query is written to support sorting and paging variables, making it flexible for reuse.
- Add the
getRecentOrdersfunction.
Our code doesn’t need to concern itself with how the user token used to authenticate the GraphQL request is managed or retrieved, with B3Request handling this for us.
Note the use of map to form a flattened array of orders from each node in allOrders.edges in the response. getRecentOrders will return an array where each item has an orderId, poNumber, etc.
Our use of the RecentOrdersResponse type assertion tells TypeScript what to expect but doesn’t actually validate that the response data matches this. Our code currently lacks any actual error handling for the GraphQL fetch. Zod, which was used in the previous “mini-app” exercises, can be used in the same way within the Buyer Portal as well.
- Open
pages/Overview/components/RecentOrders.tsx, update the import from../datato include the new function, and remove the mock data array.
- In the
useEffectcallback, replace the currentsetOrderscall with a call togetRecentOrders.
The orders state will be updated when the response is received from the GraphQL request.
Now that we’re loading real data, let’s complete the “spinner” implementation by adding a piece of React state to track when the data is loading.
- Add a state variable and update the
useEffectcallback and JSX accordingly.
Remember that we’ve already configured our component to defer triggering this data fetching until the accordion is expanded.
Revisit your Overview page and see the Recent Orders fetch in action. Try using the Network tab in your browser’s developer tools to inspect the GraphQL request and response.
Step 2: Add Other Data-Driven Sections
As this is an Overview page, we want to show more than just recent orders. There are already components and GraphQL queries in place in our boilerplate code for invoices, shopping lists, and quotes. Let’s add these remaining sections.
- Open
pages/Overview/index.tsxand add imports for the other components.
- Similar to the
ordersOpenstate we’re using to track when the “Recent Orders” accordion is open, add state values for the other sections.
Remember that we’ve used selective permission checking to control whether “Recent Orders” is displayed. We’ll need to add similar logic for the other sections.
- Add permission checks for the new sections.
- Add the appropriate JSX to render the new sections. The following code is verbose, but this is simply applying the same component structure we already used for “Recent Orders.”
Your Overview page should now have fully functioning sections for all data types. Observe the GraphQL requests that are triggered by expanding each accordion.
Full Exercise Code
Taking It Further
- Review the B2B GraphQL API or the native Buyer Portal code to explore the queries related to company users and addresses. Add summary information about these data types to the Overview page.